Showing posts with label tiddly inks. Show all posts
Tuesday, January 13, 2015 0 comments

Tiddly Inks DT Call

Today I have just a quick post with a card I've made for a Design Team call at Tiddly Inks.


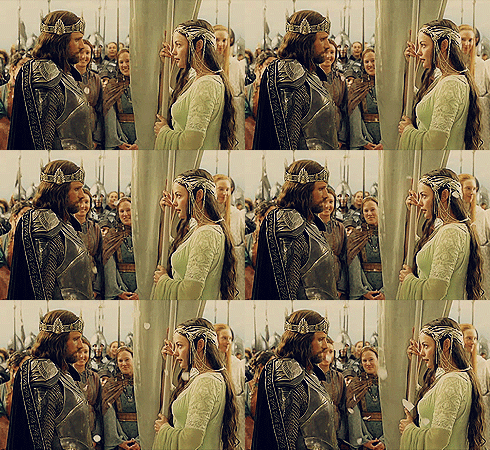
I've used a movie couple/scene for inspiration for this card. Anyone wants to guess which one? The answer at the end of this post :)

Anyway... for this card I've used this cute digital stamp. I've fallen in love with it first time I saw it.
I've colored it with a combination of Promarkers and Marvy Uchida Le Plume Markers. Now, I'm not a professional alcohol markers specialist but I quite like the result I've achieved this time. Do you?

To make it pop I've keep the rest of the card white but I didn't want it to be "just" white. I've die cut a heart from a white panel and put a "Piestra Tile" diecut (from Memory Box) behind it. Also added some debossed elements in two corners.

The white background also went well with my inspiration :)
Speaking of which...
This was my inspiration. Have I ever mentioned I'm a LoTR freak? :D
Did you guess right?

Take care,
elleth


Sunday, August 10, 2014 1 comments

Tiddly Inks DT call

One of my favorites digital stamp stores is having a DT call.


I've been using their stamps before. You can see one of the cards with Tiddly Ink stamps here, two others here.
For the call I created three new projects with three different stamps I already owned.

First one is not a card but a bookmark. This cute birdie stamp is so perfect for a long bookmark shape. It can be easily personalized with recipient name. I've decided to die cut the world READ and put the letter E backwards. With those little birds it looks so cute, don't you think?


Next is the card with little dogie and the balloons. I've printed them two times. One for the background, second for the main, colored, image. I've done so, so that I could put them with some foam tape and I did not have to cut out all those balloon's strings. Of course you can add some twine or embroidery floss for the string but I decided not to do so this time.

The background is done with the help of Distress Inks in Peacock Feather and Tumbled Glass.
The sentiment is from Scrapberry's stamp set.


And the last but not least one. 
This time I've decided to add a little dimension to the main image by printing it several times and then coloring different parts of it and layering it on each other. This technique gives an image an awesome 3D look but it does require some patience.
You've got to start with coloring the layer of the image that will be at the back and then move forward adding additional layers, each closer to image "front".
Is sound so complicate as I'm writing it, but it truly isn't!


For the girl's outfit I've used some red pattern paper with polka dots, however the dots were spaced too far from each other as for that small image so I added some more with white gel pen.

The snowflakes I've used for this card are Impression Obsession dies.

Tell me, which one is your favorite.


Tiddly Inks images used:


elleth


Sunday, June 1, 2014 1 comments

May mail call at KWerner

This time I wanted to show you a card I've made for Kristina Werner's birthday and May mail call at her blog.
She's one of the most talented crafters I know. If you don't know her yet (how is that even possible? :)) please go and check her blog.
I do hope my card reached her on time and in good condition.
Anyway, here it is:

The background is made using the technique that I know thanks to Kristina - watercoloring with Distress Inks. I've also went over it with water mixed with mica powder through the cloud stencil.

This cute little stamp is from Tiddly Inks (Flying High Anna Belle). I colored it with watercolor markers to match the background.

Here's how the inside of the card looks like:


Also I'm putting this card for Anything Goes challenge at Simon Says Stamp blog.

Love,
elleth


;